Introduction to Candied Papaya
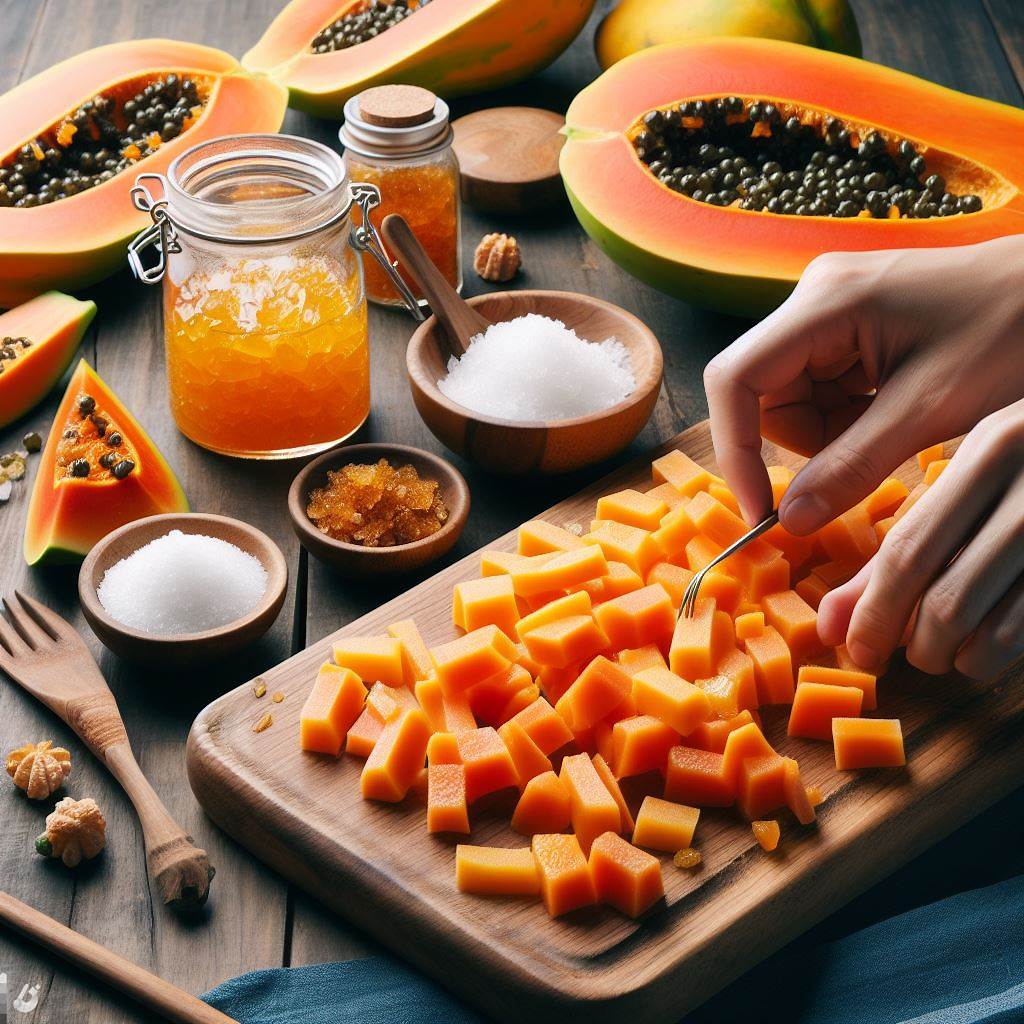
Candied papaya is a delightful and indulgent treat that combines the natural sweetness of papaya with the rich flavors of homemade candy. This preserved fruit is created by soaking papaya slices in a sugar syrup, allowing them to absorb the sweet flavors and develop a chewy texture.
Candied papaya is a popular choice among those who enjoy sweet treats and are looking for a unique twist on traditional candied fruits. The vibrant orange color and tropical taste of the papaya make it an appealing option for both snacking and incorporating into various recipes.
Homemade candied papaya offers a wonderful balance between the natural fruit flavors and the sugary coating. It can be enjoyed on its own as a delicious snack or used as an ingredient in desserts, such as cakes, cookies, or even ice cream toppings.
Whether you have a sweet tooth or simply appreciate the versatility of preserved fruits, candied papaya is sure to satisfy your cravings. Its delightful combination of flavors and textures makes it an enticing option for those seeking something different in their confectionery choices.
Step 1: Selecting and Preparing the Papaya
When it comes to enjoying a delicious papaya, selecting and preparing the fruit properly is key. By following these steps, you can ensure that you are choosing a ripe papaya and preparing it for consumption in the best way possible.
1. Papaya Selection: Start by selecting a papaya that is ripe and ready to eat. Look for a fruit that has vibrant orange or yellow skin with no green tinges. It should also feel slightly soft to the touch but not mushy.
2. Cutting and Peeling: Once you have chosen your papaya, wash it thoroughly under running water to remove any dirt or debris from the skin. Next, place the papaya on a cutting board and carefully cut off both ends using a sharp knife.
3. Removing Seeds: After cutting off the ends, stand the papaya upright on one end and make vertical cuts along the length of the fruit to remove the skin. Once all of the skin is removed, cut the papaya in half lengthwise.
4. Scooping out Seeds: Use a spoon to scoop out all of the seeds from each half of the papaya. The seeds are not typically consumed as they can have a bitter taste.
Now that your papaya is prepared, you can enjoy it as is or use it in various recipes such as smoothies, salads, or desserts. Remember to store any leftover papaya in an airtight container in the refrigerator for optimal freshness.
Step 2: Preparing the Syrup Mixture
In the second step of preparing the candy syrup, it is crucial to get the mixture just right. The syrup serves as the base for various types of candies and confections, and its preparation requires attention to detail.
To start, gather the necessary ingredients for your candy syrup recipe. This typically includes sugar and water in specific ratios. The exact measurements will depend on the desired consistency and sweetness level of your final product.
Once you have measured out your sugar and water, combine them in a saucepan over medium heat. Stir continuously until the sugar has completely dissolved into the water. This process ensures that your syrup will have a smooth texture without any graininess.
At this stage, you can also consider adding flavorings to enhance the taste of your candy. Popular options include vanilla extract or cinnamon, but feel free to experiment with other flavors that complement your recipe.
After incorporating any desired flavorings, continue heating the mixture until it reaches a specific temperature indicated by your candy thermometer or recipe instructions. Different candies require different temperatures to achieve their desired texture and consistency.
Remember to exercise caution while handling hot syrups as they can cause severe burns if not handled properly. Use oven mitts or heat-resistant gloves when stirring or pouring the mixture.
By following these steps and paying attention to detail during this crucial stage of candy making, you’ll be well on your way to creating delicious treats with perfectly prepared syrup mixtures.
Step 3: Cooking the Papaya in Syrup
Once you have prepared the syrup for your papaya, it’s time to cook the fruit and infuse it with all the delicious flavors. This step is crucial in achieving a tender and flavorful result. Follow these instructions to simmer the papaya in syrup while maintaining the heat and thickness of the syrup.
- Gently place the peeled and sliced papaya into a saucepan containing the prepared syrup. Make sure that all pieces are fully submerged in the liquid.
- Set your stove to medium heat and bring the syrup to a gentle simmer. Avoid boiling as this can overcook or break down the fruit.
- As you simmer, keep an eye on both the papaya and syrup consistency. Stir occasionally to prevent sticking or burning at the bottom of the pan.
- To maintain a consistent heat level, adjust your stove’s temperature as needed throughout cooking. Aim for a steady simmer rather than rapid boiling.
- Pay attention to how thick or thin your syrup becomes during cooking. If it starts to thin out too much, continue simmering until it reaches your desired consistency.
- It is important not to rush this step, as allowing sufficient time for cooking will ensure that both papaya and syrup achieve optimal flavor infusion.
By following these steps, you can successfully cook your papaya in syrup while maintaining both heat and thickness of the syrup, resulting in a delightful treat that is tender, flavorful, and visually appealing.
Step 4: Drying and Dehydrating the Candied Papaya
Drying and dehydrating the candied papaya is an essential step in preserving its flavor and extending its shelf life. There are two common methods for drying the candied papaya: oven drying and sun drying.
Oven drying is a convenient option as it allows for precise temperature control. To oven dry the candied papaya, preheat your oven to a low temperature, around 150°F (65°C). Arrange the candied papaya pieces on a baking sheet lined with parchment paper, making sure they are evenly spaced. Place the baking sheet in the oven and leave the door slightly ajar to allow moisture to escape. The drying process can take several hours, so it’s important to periodically check on the progress of your candied papaya.
Alternatively, sun drying is a traditional method that relies on natural sunlight. Choose a sunny day with low humidity for optimal results. Place your candied papaya pieces on a clean and dry surface, such as a wire rack or bamboo mat. Ensure proper air circulation around each piece by spacing them out adequately. It’s crucial to protect your candied papaya from insects or dust by using mesh screens or covering them with cheesecloth. Leave them under direct sunlight for several days until they become leathery and free from moisture.
Once you have dried your candied papaya using either method, proper storage is key to maintaining their quality over an extended period of time. Store them in an airtight container or resealable bag to prevent moisture absorption from the surrounding environment. It’s advisable to keep them in a cool, dark place away from direct sunlight or heat sources as exposure can cause loss of flavor and texture degradation.
By following these steps of drying and dehydrating along with appropriate storage techniques, you can enjoy your homemade candied papaya for months without compromising its taste or texture.
Bonus Tips for Variations and Serving Suggestions:
When it comes to adding spices or herbs for different flavors, the possibilities are endless. Consider incorporating ingredients like ginger or mint to add a unique twist to your dishes. Ginger can add a subtle warmth and depth of flavor, while mint can provide a refreshing and cooling sensation.
In terms of creative uses for cA Sweet Delight: Mastering the Art of Making Candied Pineapple at Home papaya, this versatile ingredient can be used in various ways to enhance your desserts or baked goods. Try using it as a topping for ice cream or yogurt for an added burst of sweetness and texture. Alternatively, you can incorporate candied papaya into your baked goods such as cakes, cookies, or muffins to infuse them with a tropical flair.
By experimenting with different spices and herbs, as well as exploring creative uses for ingredients like candied papaya, you can elevate your culinary creations and delight your taste buds with new and exciting flavors.
Conclusion: Enjoy Your Homemade Candied Papayas!
The process of making homemade candied papayas can be a delightful and rewarding experience. By following the steps outlined in this guide, you can transform fresh papayas into a sweet and flavorful treat that is sure to impress your friends and family.
Whether you choose to enjoy the candied papayas on their own or incorporate them into other recipes, such as desserts or salads, they are sure to add a burst of tropical flavor to any dish. The versatility of candied papayas allows for endless possibilities in culinary creations.
So why not give it a try? With just a few simple ingredients and some patience, you can create your own batch of homemade candied papayas that will have everyone asking for more. So go ahead, indulge in this delicious treat and savor the taste of your homemade creation!


