Introduction to Cassava Flour and Its Benefits in Baking
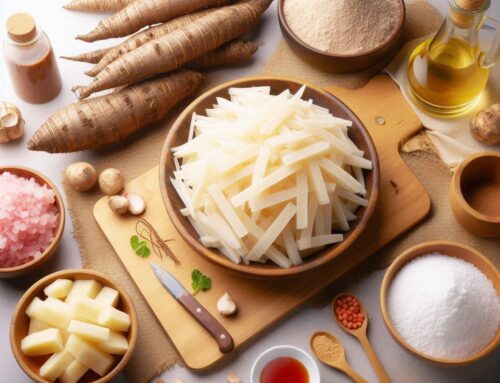
Cassava flour is rapidly gaining popularity as a versatile and nutritious alternative in the world of gluten-free baking. Derived from the root of the cassava plant, this flour is celebrated for its ability to mimic the texture and consistency of traditional wheat flour, making it an excellent choice for those seeking gluten-free options. One of the primary cassava flour benefits is its natural gluten-free composition, which makes it suitable for individuals with celiac disease or gluten sensitivities.
In addition to being gluten-free, cassava flour offers a range of nutritional advantages. It is rich in carbohydrates, providing a quick source of energy, and contains essential vitamins and minerals such as vitamin C, folate, and potassium. These nutrients contribute to various health benefits of cassava flour, including supporting immune function and promoting cardiovascular health.
Cassava nutrition also extends to its high fiber content, which aids in digestion and helps maintain stable blood sugar levels. This makes it an appealing choice not only for those with dietary restrictions but also for anyone looking to incorporate more fiber into their diet.
As part of the broader category of alternative flours, cassava stands out due to its neutral flavor profile that seamlessly blends into both sweet and savory recipes. Whether you’re crafting a delicate pastry or hearty bread loaf, incorporating cassava flour into your baking can enhance texture while offering nutritional benefits that traditional flours may lack. As awareness grows around diverse dietary needs and preferences, cassava flour continues to emerge as a valuable ingredient in modern kitchens worldwide.
Essential Tips for Baking with Cassava Flour
Baking with cassava flour can open up a world of delicious possibilities, especially for those seeking gluten-free alternatives. Here are some essential tips to ensure success in your baking endeavors.
Firstly, understanding cassava flour substitutions is crucial. Cassava flour is not a one-to-one substitute for wheat flour due to its unique properties. It’s best used when recipes are specifically designed for it, or when you’re familiar with adjusting the ratios and other ingredients to achieve the desired outcome.
When learning how to use cassava flour in recipes, start by experimenting with small batches. This will allow you to tweak your approach without wasting ingredients. Cassava flour tends to absorb more liquid than wheat flour, so you may need to increase the moisture content of your recipes by adding extra eggs or liquids like milk or water.
Achieving the right texture can be tricky but rewarding. Cassava flour has a neutral taste and fine texture that works well in cakes, cookies, and breads when combined with other flours like almond or coconut for structure and flavor balance. Remember that patience is key; allow baked goods made with cassava flour some time to cool before serving as this helps them firm up properly.
By keeping these baking tips in mind and embracing a bit of experimentation, you’ll soon master the art of using cassava flour in your favorite recipes while enjoying its health benefits and versatility.
A Beginner’s Guide to Substituting Cassava Flour in Traditional Recipes
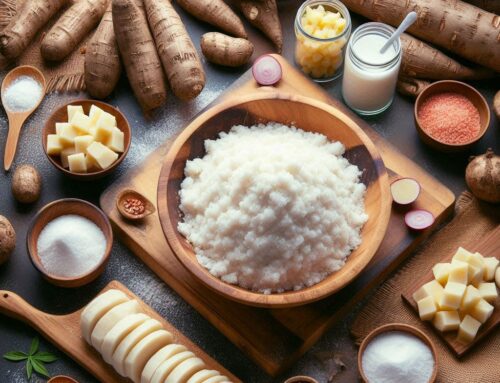
Cassava flour has become a popular choice for those looking to create gluten-free recipes. Its versatility and similar texture to wheat flour make it an excellent option for converting traditional recipes. When substituting cassava flour for wheat flour, the general substitution ratio is 1:1. This means you can replace one cup of wheat flour with one cup of cassava flour in most recipes without significant changes to texture or flavor.
However, it’s important to note that while cassava and wheat flours are similar in some respects, they do have different properties. Cassava flour tends to absorb more liquid than wheat flour, so you may need to adjust the amount of liquid in your recipe accordingly. Additionally, because cassava is naturally gluten-free, it lacks the elasticity that gluten provides. For baked goods like bread or pizza dough, incorporating a binding agent such as xanthan gum or eggs can help achieve a desirable texture.
When converting recipes, start with simple dishes like pancakes or cookies where minor adjustments are easier to manage. As you become more comfortable with using cassava flour, you can experiment with more complex gluten-free recipe adaptations. Remember that practice makes perfect; don’t be afraid to tweak your approach until you find the right balance for your culinary creations.
Step-by-Step Recipe: Classic Cassava Flour Bread for Beginners
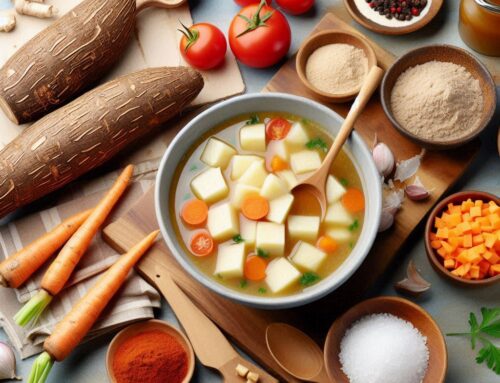
If you’re new to gluten-free baking and eager to try your hand at making bread, a classic cassava flour bread is an excellent place to start. This step-by-step recipe will guide you through the process, ensuring you create a delicious homemade loaf that’s both satisfying and simple.
Ingredients:
- 2 cups of cassava flour
- 1 teaspoon of salt
- 1 teaspoon of baking soda
- 4 large eggs
- 1/4 cup of olive oil or melted coconut oil
- 1 tablespoon of apple cider vinegar
Instructions:
- Preheat Your Oven: Start by preheating your oven to 350°F (175°C). It’s important that the oven is hot enough when you’re ready to bake your bread.
- Prepare Your Baking Pan: Line a loaf pan with parchment paper or lightly grease it with oil to prevent sticking.
- Mix Dry Ingredients: In a large mixing bowl, combine the cassava flour, salt, and baking soda. Stir well so that these dry ingredients are evenly distributed.
- Combine Wet Ingredients: In another bowl, whisk together the eggs, olive oil (or coconut oil), and apple cider vinegar until smooth.
- Create Your Dough: Gradually add the wet mixture into the dry ingredients, stirring continuously until you form a dough-like consistency. The dough should be thick but manageable.
- Transfer to Pan: Pour or scoop the dough into your prepared loaf pan, smoothing out the top with a spatula for an even finish.
- Bake Your Bread: Place the pan in your preheated oven and bake for approximately 45 minutes or until a toothpick inserted into the center comes out clean.
- Cool Before Slicing: Allow your cassava bread to cool in the pan for about 10 minutes before transferring it to a wire rack to cool completely.
This easy bread recipe with cassava flour offers not only simplicity but also versatility; enjoy it plain or as part of any meal throughout your day! Whether you’re seeking gluten-free options or just exploring new baking adventures, this homemade cassava bread is sure to become a staple in your kitchen repertoire.
Cassava Flour Baking Mistakes to Avoid as a Beginner
When diving into the world of cassava flour baking, beginners often encounter unique challenges that can lead to less-than-perfect results. Understanding and avoiding common baking mistakes is crucial for creating delightful, fluffy baked goods.
One frequent issue is not accounting for the moisture-absorbing properties of cassava flour. Unlike wheat flour, cassava absorbs more liquid, which can result in overly dense textures if not properly balanced with wet ingredients. To troubleshoot this, consider increasing the amount of liquid in your recipe slightly or incorporating additional eggs to achieve a lighter texture.
Another mistake is treating cassava flour as a one-to-one substitute for all-purpose flour without adjustments. This can lead to structural issues in your baked goods. It’s important to follow recipes specifically designed for cassava flour or experiment with small batches until you find the right balance.
Lastly, overmixing your batter can also contribute to dense outcomes. Cassava flour-based batters require gentle mixing just until combined to maintain airiness and prevent heaviness.
By being mindful of these common pitfalls and troubleshooting baking issues with cassava flour, beginners can avoid dense textures and enjoy successful baking experiences from the start.
The Best Tools and Ingredients for Successful Baking with Cassava Flour
When venturing into the world of gluten-free baking with cassava flour, having the right tools and ingredients is crucial for achieving delicious results. For beginners, equipping your kitchen with a few essential baking tools can make the process smoother and more enjoyable. Start with a good set of measuring cups and spoons to ensure accuracy in your recipes. A high-quality mixing bowl and sturdy whisk will help you blend ingredients evenly, while a silicone spatula is perfect for scraping down the sides of your bowl.
Cassava flour itself is a versatile ingredient that can be used in an array of recipes, but pairing it with other essential gluten-free ingredients can enhance its performance. Consider keeping xanthan gum or psyllium husk on hand as these can improve the texture and elasticity of your baked goods. Additionally, incorporating starches like tapioca or arrowroot powder can help mimic the lightness typically provided by gluten.
Lastly, don’t overlook kitchen essentials such as parchment paper for lining baking sheets, ensuring easy release of your creations without sticking. With these tools and ingredients at your disposal, you’re well on your way to mastering the art of baking with cassava flour while adhering to a gluten-free lifestyle.