Introduction: The Benefits of Making Canned Papaya at Home
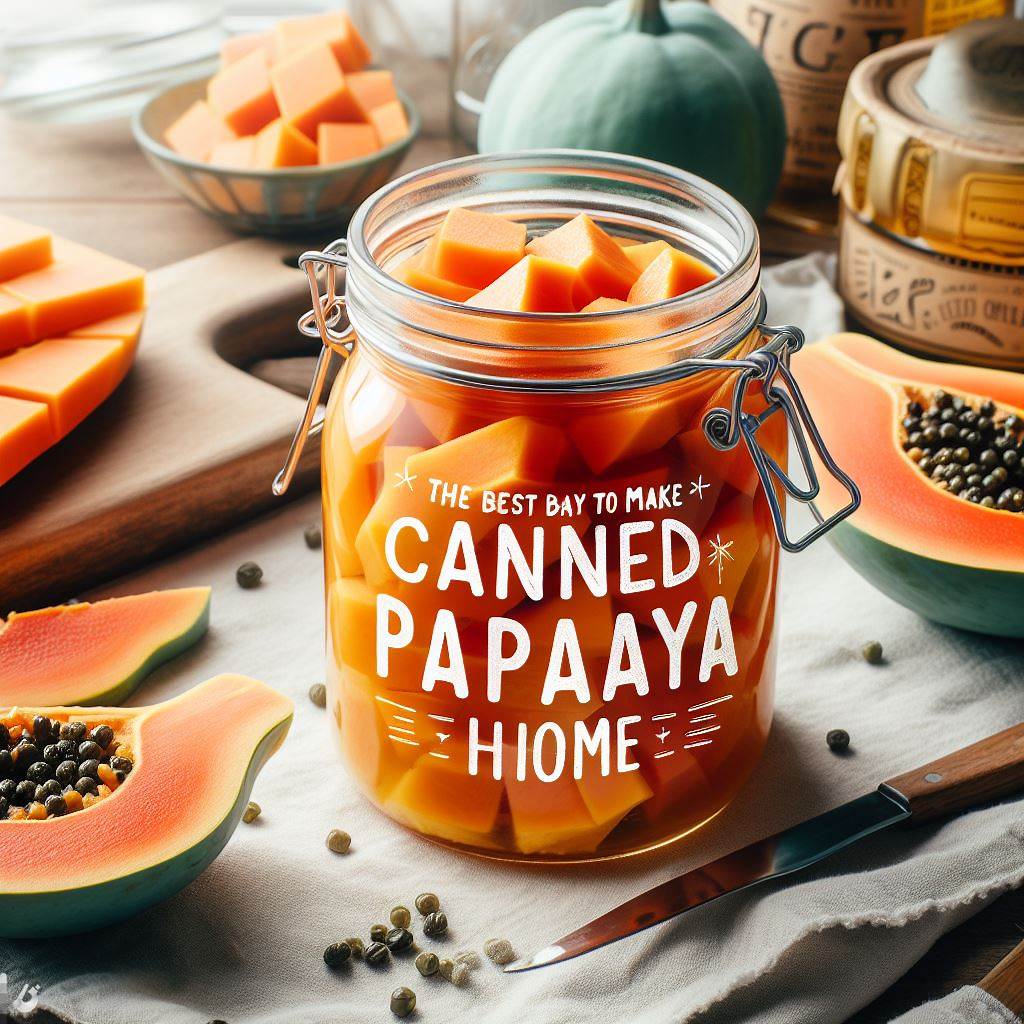
Canned fruits have long been a convenient and popular option for those seeking to enjoy the taste of fresh produce all year round. While store-bought canned fruits offer convenience, there is something special about making your own homemade canned fruit. In this section, we will explore the benefits of making canned papaya at home and discover why preserving this tropical fruit can be a rewarding and delicious endeavor.
Canning fruit, such as papaya, allows you to capture its natural flavors and nutrients while extending its shelf life. By preserving papaya in cans, you can enjoy this exotic fruit even when it is out of season or unavailable in your local grocery store. Furthermore, homemade canned papaya gives you complete control over the ingredients used during the canning process, ensuring that no artificial additives or preservatives are included.
Making your own canned papaya also offers a sense of satisfaction and accomplishment. It allows you to engage in a hands-on activity that connects you with traditional food preservation methods while creating a supply of delicious fruit that can be enjoyed throughout the year. Additionally, homemade canned papaya can make for thoughtful gifts or additions to your pantry stock.
In the following sections, we will delve into the specific benefits of making canned papaya at home. From superior taste and texture to cost savings and customization options, we will explore why this culinary practice is gaining popularity among food enthusiasts. So let’s dive in and uncover the enticing advantages awaiting those who embark on their homemade canned papaya journey!
Step 1: Selecting the Right Papaya for Canning
Selecting the right papaya is crucial when it comes to canning. To ensure the best results, there are a few key factors to consider. First and foremost, choosing ripe papayas is essential. Look for fruits that are fully ripened but not overripe, as this will ensure optimal flavor and texture in your canned product.
When it comes to the variety of papaya, some are better suited for canning than others. The Maradol and Solo varieties are popular choices due to their sweet taste and firm flesh, which holds up well during the canning process.
In addition to ripeness and variety, selecting firm and unblemished fruits is important. Avoid papayas that have soft spots, bruises, or any signs of mold or decay. Opt for ones that feel slightly firm when gently pressed but not too hard.
By following these guidelines in selecting the right papaya for canning, you’ll be on your way to creating delicious and long-lasting canned papaya products.
Step 2: Preparing the Papayas for Canning
In the second step of canning papayas, it is important to properly prepare the fruit before placing them in jars. This involves a few key tasks such as washing and sanitizing the jars, peeling and seeding the papayas, and cutting them into desired shapes or sizes.
Firstly, it is crucial to wash and sanitize the jars that will be used for canning. This helps ensure that any bacteria or contaminants are removed, reducing the risk of spoilage. Jars can be washed with hot soapy water and rinsed thoroughly before being placed in boiling water for sanitization.
Next, the papayas need to be prepared by peeling and seeding them. The skin of the papaya should be carefully removed using a sharp knife or a vegetable peeler. Once peeled, cut the papaya in half lengthwise and scoop out the seeds using a spoon.
After peeling and seeding, you can proceed to cut the papayas into your desired shapes or sizes. Some prefer to dice them into small cubes while others may opt for larger slices or chunks. It is important to ensure that all pieces are relatively uniform in size for more even cooking during canning.
By following these steps and properly preparing your papayas for canning, you will be well on your way to preserving this delicious fruit for future enjoyment.
Step 3: Preparing the Syrup or Liquid for Canning
When it comes to canning papayas, preparing the right syrup or liquid is an essential step. The most common option is a sugar syrup, which helps preserve the fruit and adds sweetness. However, there are alternative options available as well, such as using fruit juice or flavored liquids.
To prepare a sugar syrup for canned papayas, you can follow a simple recipe. Start by dissolving sugar in water over medium heat until it reaches a boil. The ratio of sugar to water typically varies depending on your desired sweetness level and the consistency you prefer. A common ratio is 1 part sugar to 2 parts water for a medium syrup.
If you prefer an alternative option, fruit juice can be used instead of a traditional sugar syrup. This adds natural flavors to the canned papayas and can complement their taste. Choose a juice that pairs well with papaya, such as pineapple or orange juice.
Another option is using flavored liquids like syrups or infused waters. These can add unique flavors and enhance the overall taste of the canned papayas. Some popular choices include vanilla-infused water or mint-flavored syrups.
Ultimately, the choice of syrup or liquid for canning papayas depends on your personal preference and desired flavor profile. Whether you opt for a traditional sugar syrup, fruit juice, or flavored liquids, make sure to follow proper canning procedures to ensure food safety and enjoy delicious preserved papayas throughout the year.
Step 4: Packing the Papayas into Jars and Adding the Liquid
Properly filling jars with papaya pieces and adding the appropriate liquid is a crucial step in the process of preserving papayas. This step ensures that your preserved papayas stay fresh and flavorful for an extended period.
When packing the papaya pieces into jars, it is essential to do so carefully and efficiently. Start by selecting clean, sterilized jars that are suitable for canning. Ensure that the jars are free from any cracks or defects that could compromise the preservation process.
To properly fill the jars, begin by placing papaya pieces into each jar, leaving adequate headspace at the top. Headspace refers to the empty space between the top of the food and the lid of the jar. This space allows for expansion during processing and helps create a vacuum seal when properly sealed.
Once you have filled each jar with papaya pieces, it’s time to add your chosen liquid to cover them completely. This liquid can be a syrup or a brine solution, depending on your preference and recipe requirements. Pour in enough liquid to ensure all papaya pieces are fully submerged, allowing for optimal preservation.
It is important to note that different recipes may call for specific measurements or types of liquids. Always follow your chosen recipe closely to ensure proper packing and preservation techniques.
By following these steps of packing your papayas into jars and adding an appropriate liquid, you can ensure that your preserved fruit stays deliciously fresh for months to come.
Step 5: Processing and Sealing the Jars for Long-term Storage
To ensure the safety and longevity of your canned goods, it is essential to properly process and seal the jars using the water bath canning method. This step is crucial in preventing spoilage or contamination of your preserved foods.
Firstly, it is important to sterilize the jars before filling them with your prepared food. Sterilization can be achieved by washing the jars in hot, soapy water and then submerging them in boiling water for a few minutes. Alternatively, you can run them through a dishwasher cycle on high heat.
Once sterilized, carefully remove the jars from the hot water using jar tongs or oven mitts to avoid burns. Place them on a clean towel or rack to cool slightly before filling.
Next, fill each jar with your prepared food, leaving appropriate headspace as specified in your recipe. It is crucial not to overfill as this could interfere with proper sealing during processing.
After filling each jar, wipe the rims clean with a damp cloth or paper towel to ensure a good seal. Any food residue left on the rim may prevent an airtight seal from forming.
Now it’s time to seal the jars tightly with lids and rings. Place a lid on top of each jar and secure it with a ring just until fingertip tightness. It’s important not to overtighten as this could hinder air escape during processing.
Once all jars are filled and sealed, they are ready for processing in a water bath canner. The water bath canning method involves submerging sealed jars in boiling water for a specified amount of time based on your recipe.
Carefully place filled jars into the canner using jar tongs or other suitable tools to prevent breakage. Ensure that there is enough boiling water covering the tops of the jars by at least one inch.
Maintain a steady boil throughout processing time, adjusting heat as necessary. After the recommended processing time has elapsed, carefully remove the jars from the canner using jar tongs and place them on a towel or rack to cool.
As the jars cool, you may hear a satisfying “pop” sound, indicating that a proper seal has been achieved. It is important to check for proper sealing by pressing down on the center of each lid. If it does not flex or make a popping sound when pressed, it is sealed correctly.
Any jars that have not properly sealed should be refrigerated and consumed within a few days. Properly sealed jars can be stored in a cool, dark place for long-term storage.
By following these steps and utilizing the water bath canning method, you can confidently process and seal your jars to ensure safe and flavorful preserved foods for months or even years to come.
Step 6: Storing and Enjoying Your Homemade Canned Papayas
Once you have successfully canned your papayas, it’s important to store them properly to ensure their longevity and quality. Follow these tips for storing your homemade canned papayas in a cool and dark place:
- Choose the right storage location: Find a cool, dark area in your pantry or basement where the temperature remains consistent. Avoid areas that are exposed to direct sunlight or fluctuating temperatures.
- Use proper containers: Ensure that you have used clean, sterilized jars with tight-fitting lids for canning your papayas. This will help maintain the freshness and prevent any spoilage.
- Label and date your jars: It’s essential to label each jar with the contents and date of canning. This will help you keep track of their shelf life and ensure that you consume them before they expire.
- Rotate your stock: To make sure that none of your canned papayas go to waste, practice first-in-first-out rotation. Place newly canned jars at the back of the storage area and use older ones first.
The shelf life of homemade canned fruits, including papayas, can vary depending on various factors such as acidity levels, sugar content, and storage conditions. As a general guideline, most properly canned fruits can last up to 1-2 years when stored in ideal conditions.
Now that you have stored your homemade canned papayas safely let’s explore some creative ways to enjoy them in recipes:
- Tropical smoothies: Blend canned papaya chunks with other tropical fruits like mangoes or pineapples for a refreshing smoothie packed with flavors.
- Papaya salsa: Combine diced canned papayas with onions, jalapenos, lime juice, cilantro, and salt for a zesty salsa that pairs well with grilled meats or as a topping for tacos.
- Papaya bread or muffins: Add chopped pieces of canned papaya into your favorite bread or muffin recipe for a delightful tropical twist.
- Papaya salad: Toss canned papaya slices with fresh greens, cucumber, cherry tomatoes, and a tangy dressing for a light and healthy salad option.
Remember to always adjust the sweetness and acidity levels in your recipes based on the sugar content and preserving liquid used in your canned papayas. With these tips and creative ideas, you can make the most of your homemade canned papayas and enjoy their delicious flavor all year round.
Conclusion: Experience the Delight of Homemade Canned Papaya
In conclusion, experiencing the delight of homemade canned papaya is a truly satisfying and enjoyable experience. By taking the time to prepare and preserve this tropical fruit in your own kitchen, you can savor its natural flavors and enjoy it throughout the year.
Homemade canned papaya offers numerous benefits compared to store-bought options. Firstly, you have complete control over the ingredients used, ensuring that no artificial additives or preservatives are included. This results in a healthier and more wholesome product that you can feel good about consuming.
Additionally, making your own canned papaya allows you to customize the taste according to your preferences. Whether you prefer it sweet or tangy, you can adjust the sugar levels and add spices or flavorings to suit your taste buds.
Furthermore, there is a sense of satisfaction that comes with creating something from scratch in your own kitchen. The process of peeling, slicing, and preserving the papaya not only allows you to appreciate the fruit’s natural beauty but also gives you a sense of accomplishment as you see rows of beautifully preserved jars lining your pantry shelves.
Lastly, enjoying homemade canned papaya provides a connection to tradition and nostalgia. Many families have cherished recipes passed down through generations, creating an emotional bond with this delightful treat.
So why not embark on this culinary adventure and experience the delight of homemade canned papaya? It’s an opportunity to create something deliciously unique while enjoying all the benefits that come with preserving this tropical fruit in your own home.


